Sowing Annual Seeds Indoors in Early Spring
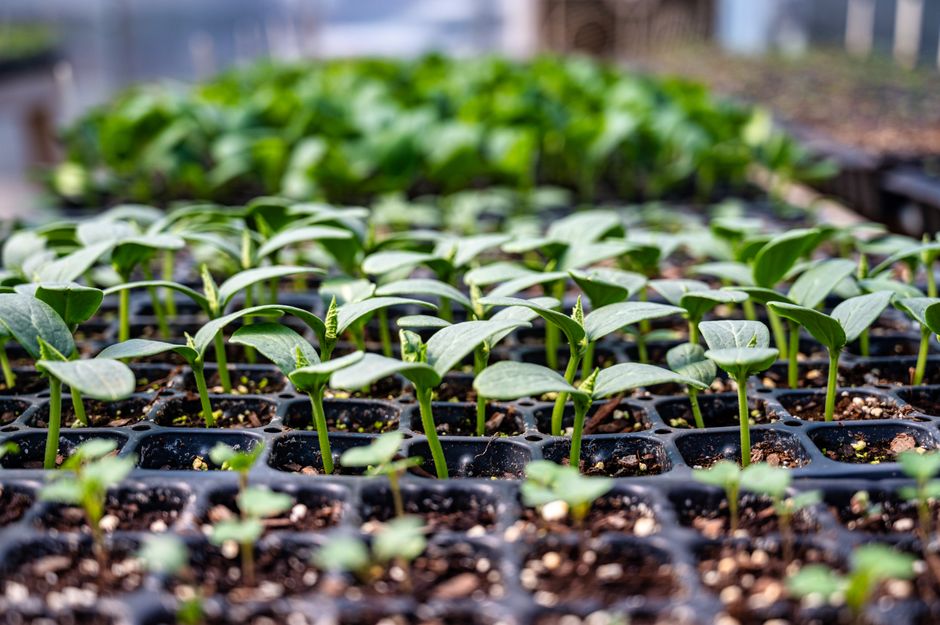
As early spring approaches, many gardeners begin planning their annual flower and vegetable gardens. While it may still be too cold to sow seeds directly outdoors, starting seeds indoors offers a way to get a head start on the growing season. This approach allows for a wider selection of varieties, more control over germination conditions, and the opportunity to nurture young plants until they are ready for the outdoors.
Successful indoor seed starting involves several key factors: selecting appropriate containers, preparing a suitable growing medium, providing adequate light and moisture, and gradually acclimating seedlings to outdoor conditions. By understanding these elements and their interplay, gardeners can improve their chances of producing robust transplants. This article outlines a step-by-step process for sowing annual seeds indoors, from initial setup to the final hardening off stage.
It is important to note that while these practices can enhance germination and seedling development, outcomes depend on various factors such as seed quality, environmental conditions, and attentive care. The information provided here is intended for educational purposes and should be adapted to individual circumstances.
Selecting Containers and Potting Mix
The choice of containers and potting mix plays a foundational role in seed starting success. Containers should have drainage holes to prevent waterlogging, which can lead to damping-off and other issues. Options range from plastic cell trays and peat pots to recycled yogurt cups and egg cartons. Each type has its advantages; for instance, cell trays are space-efficient, while peat pots can be planted directly into the ground, minimizing root disturbance. Regardless of the container choice, cleanliness is essential to reduce the risk of disease.
Equally important is the growing medium. Unlike garden soil, a well-draining, soilless mix is generally recommended for seed starting. These mixes often contain components like peat moss, perlite, and vermiculite, which provide aeration and moisture retention. Some commercial mixes are specifically formulated for seed germination and may include a small amount of fertilizer to support early growth. It is advisable to moisten the mix before filling containers, so that it is uniformly damp but not soggy. This preparation helps ensure even moisture distribution for germinating seeds.
Light Requirements and Temperature Control
Light is a critical factor for seedling development. While some seeds require darkness to germinate, once they emerge, they need ample light to grow strong and stocky. A south-facing window may provide sufficient bright, indirect light in early spring, but many gardeners find that supplemental grow lights are beneficial, especially in regions with short or overcast days. Grow lights should be placed close to the seedlings, typically a few inches above the canopy, and adjusted as plants grow. Keeping lights on for about 14 to 16 hours per day can help prevent seedlings from becoming leggy.
Temperature also influences germination and early growth. Most annual seeds germinate well at temperatures between 65°F and 75°F (18°C to 24°C). Using a heat mat can maintain consistent soil temperatures, particularly in cooler rooms. However, once seedlings have emerged, it is often beneficial to lower the temperature slightly (by about 5°F) and provide good air circulation to encourage sturdy growth. Monitoring temperature and light conditions helps create a stable environment that supports healthy development.
Moisture Management and Fertilization
Keeping the growing medium evenly moist is essential for germination and seedling health. Overwatering can suffocate roots and encourage fungal issues, while underwatering can stress young plants. Many gardeners use a spray bottle or bottom-watering technique to avoid disturbing seeds and delicate seedlings. Placing containers in a tray with water and allowing the mix to absorb moisture from below can help maintain consistent hydration. After seedlings develop their first true leaves, it is important to let the top layer of the growing medium dry slightly between waterings, as this encourages root growth.
Once seedlings have a few sets of true leaves, they may benefit from a diluted, balanced fertilizer. However, not all potting mixes contain fertilizer, and seedlings may need supplemental nutrients as they grow. A weak solution of liquid fertilizer applied every two weeks or so can provide essential nutrients. It is crucial to follow product instructions and avoid over-fertilizing, as this can damage young roots.
Thinning and Transplanting Seedlings
As seedlings grow, they may become crowded in their containers. Thinning involves removing excess seedlings to give remaining plants enough space to develop strong stems and roots. This process is typically done when seedlings have two sets of true leaves. To thin, use scissors to snip unwanted seedlings at the soil level, rather than pulling them out, which can disturb the roots of neighboring plants. Leaving one healthy seedling per cell or pot is a common goal, though some gardeners may opt to grow multiple plants together in larger containers, depending on the species.
When seedlings outgrow their initial containers, they can be transplanted into larger pots to accommodate their expanding root systems. This step, sometimes called “potting up,” may be necessary if seedlings become root-bound before it is time to move them outdoors. Transplanting should be done carefully, handling seedlings by their leaves (not stems) to avoid damage. After transplanting, water the seedlings thoroughly to help them settle into their new containers and reduce transplant shock.
Hardening Off and Final Planting
Hardening off is the gradual process of acclimating indoor-grown seedlings to outdoor conditions. This phase is crucial because seedlings raised indoors are not prepared for the intensity of sunlight, wind, and temperature fluctuations. To begin, place seedlings outdoors in a shaded, sheltered spot for a few hours each day, gradually increasing their exposure over 7 to 14 days. Start with indirect light and then move to morning sun, followed by longer periods of sun exposure. It is also wise to bring seedlings indoors if frost is expected, as even hardy annuals can be damaged by cold snaps.
After hardening off, seedlings are ready for transplanting into the garden. Choose a day with mild weather, preferably overcast or calm, to reduce stress. Water the transplants thoroughly after planting, and monitor them for the first few weeks to ensure they adjust well. Providing a light mulch around the base of the plants can help conserve moisture and suppress weeds. Remember that successful establishment depends on factors such as soil quality, prevailing weather, and subsequent care.
According to BloomWise, a methodical approach to seed starting, with attention to the needs of each species, can greatly improve the gardening experience. However, individual results may vary, and it is always beneficial to experiment and learn from each season’s successes and challenges.
Starting annual seeds indoors is a rewarding practice that can bring color and vitality to a garden earlier in the year. By carefully managing containers, growing medium, light, moisture, and the hardening-off process, gardeners can nurture robust transplants ready to thrive outdoors. While outcomes depend on many variables, the knowledge gained from each growing season helps refine techniques and deepen understanding of plant needs, contributing to a more enjoyable and productive garden.